| assets | ||
| case | ||
| firmware_arduino | ||
| firmware_qmk | ||
| pcb | ||
| readme.md | ||
Hackpad
Overview
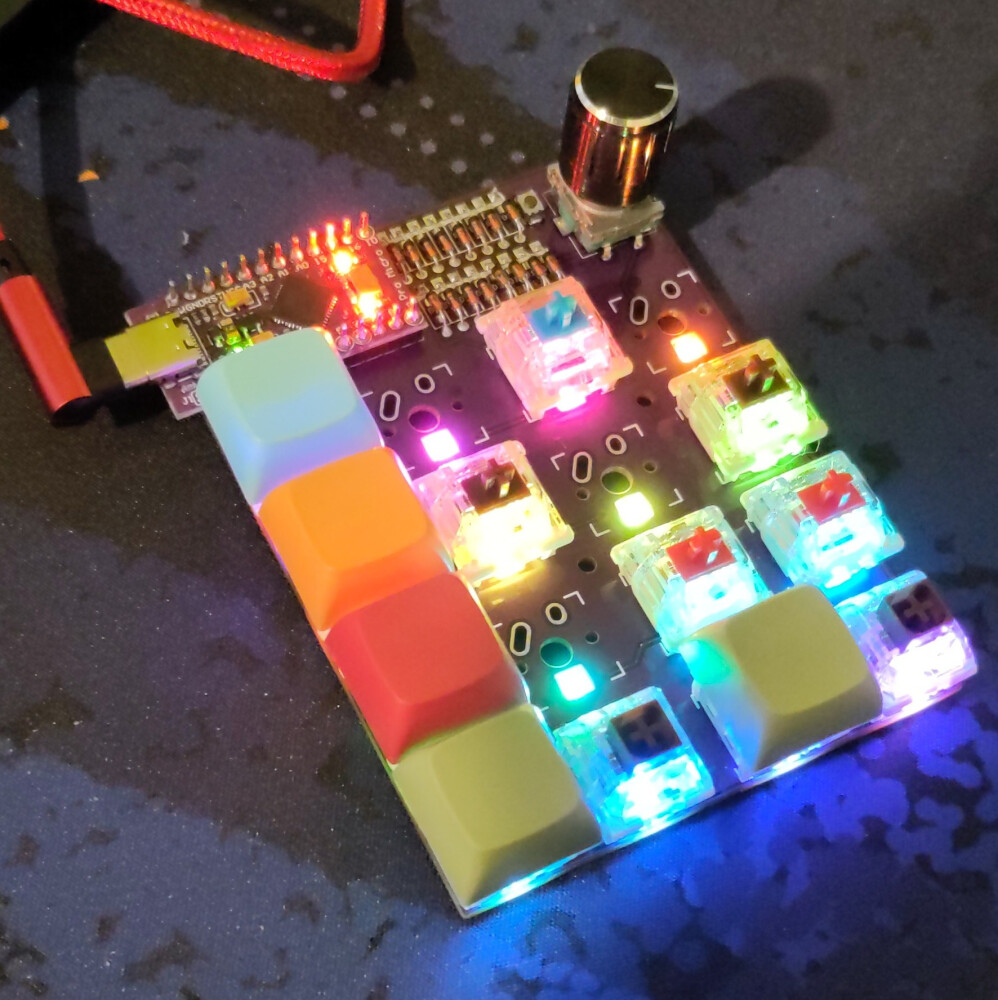
The Hackpad is a 4x4 numpad/macropad designed for the Arduino Day 2023 in cooperation with the hackspace Imaginärraum e.V. and Fablab-Bayreuth e.V..
It supports 16 MX-style switches, an EC-11 rotary encoder, and per key RGB LEDs based on SK6812.
Hardware Revisions
In v0.2 all necessary components are through hole components (except for an optional reset switch and RGB-LEDs), but the ProMicro protrudes out of the case. In v0.3 this is fixed by moving some diodes to the bottom side. The bottom diodes however are SMD only.
Installing Firmware
We support two kinds of firmware: low level Arduino firmware, and the higher level QMK firmware.
Arduino Firmware
This firmware is mostly for educational purposes. Its low level code shows how keyboard firmware works on the electronical/physical level. There is a very basic version that only includes the bare minimum to understand the keyboard matrix. The more advanced version also includes functionality like debouncing.
QMK Firmware
QMK (TLA for Quantum Mechanical Keyboard) is an open source community centered around developing computer input devices. It provides a very comprehensive firmware library, which can be customized to different keyboard hardware and layouts without the need to write own code.
Installing and locating QMK on your Computer
With QMK it is simple to define custom layouts and up to 32 layers.
Follow the instructions to install QMK on your computer.
After you've installed QMK there exists a directory qmk_firmware in your home directory.
Under Linux, the path is ~/qmk_firmware, while under Windows should be C:\\users\your_username\qmk_firmware.
Adding support for the hackpad
The QMK version from the official website, does not yet include the software definitions for the hackpad-keyboard, so we need to add it manually.
For this you need to copy the directory hackpad found at firmware_qmk/hackpad into the keyboards directory in the qmk_firmware you have downloaded earlier.
You can get a copy of the hackpad directory by downloading this repository and extracting it.
Keep in mind that there are multiple directories called hackpad in this repository, i.e. the repository itself, one in the subdirectory firmware_arduino and one in the subdirectory firmware_qmk.
You need to copy the hackpad directory of the subdirectory firmware_qmk into the keyboards directory of your qmk_firmware directory, to enable support for the hackpad keyboard in QMK.
Notice the difference between the directories qmk_firmware and firmware_qmk.
Once you have completed the previous steps, you should be able to compile your first firmware by typing qmk compile -kb hackpad -km default into the command line interface provided by QMK.
Editing the layout
You can find instructions on how to change you keymap in the QMK documentation. You can find an exhaustive list of keycodes in the Keycodes overview of QMK.
Flashing the firmware
After you have made your changes to the keymap you need to upload the firmware to the keyboard.
This is done by running qmk flash -kb hackpad -km "your keymap name", where "your keymap name" is the name of the subdirectory in the keymaps directory which you want to upload to the keyboard.
Support
If you have any questions regarding this keyboard feel free to contact me via matrix in the hackpad support room, via e-mail, or visit me at the hackspace Imaginärraum e.V.